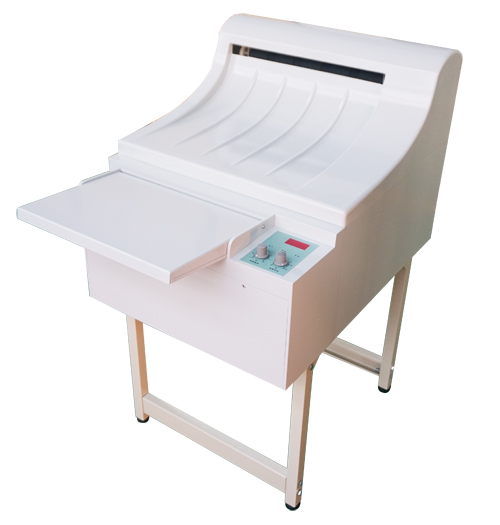
How to use an automatic X-ray film developing machine?When it comes to medical imaging and diagnosis, X-rays are an essential tool for doctors and healthcare professionals. X-rays are a type of electromagnetic radiation that can pass through the body and onto film, creating an image that reveals the internal structure of bones and tissues. The process of developing X-ray films requires precision and accuracy, which is where a good X-ray film developing machine comes into play. In this article, we will discuss how to use an automatic X-ray film developing machine to ensure the highest quality images.
An X-ray film developing machine is a device that is designed to develop X-ray films with precision and accuracy. An automatic X-ray film developing machine simplifies the process by automating the development process, making it a straightforward task that requires minimal user intervention. Here’s a step-by-step guide on how to use an automatic X-ray film developing machine:
Step 1: Loading the film
Firstly, ensure that the X-ray film is free from any debris or dust. This is essential as even a tiny speck of dirt can cause a defect in the image. Once the film is clean, load it into the film cassette, and cover it with a light-proof protective envelope.
Step 2: Filtration of the developer
The developer is a vital component of the automatic X-ray film developing machine. It is necessary to prepare the developer solution, which will require filtration using a filter paper or a filter bag. This filtration process ensures that the solution is free from any contamination and small particles that may interfere with the image quality.
Step 3: Preparing the developer solution
The next step is to mix the developer solution with water following the manufacturer’s guidelines. It is essential to get the ratios correct, and the solution should be well-mixed before pouring it into the machine.
Step 4: Setting up the machine
Now it’s time to set up the automatic X-ray film developing machine. Switch on the power supply and ensure that the chemicals are at the optimal concentration. This is normally indicated by a green light or a specific signal in the machine’s display. Prepare the machine by adding the developer solution to the machine’s reservoir, and ensure that the temperature is correctly set.
Step 5: Starting the development process
Place the film cassette with the prepared film in the dedicated location within the machine. Close the machine’s door, and start the development process. The machine will automatically handle the entire process, from the development to the fixing of the film.
Step 6: Examining the image
Once the development process is complete, the film will be pushed out of the machine, and it will be time to examine the image. Remove the protective envelope, and review the image carefully. Quality control is essential, and if an image is defective, it should be retaken using a fresh X-ray film.
In conclusion, an automatic X-ray film developing machine is a necessary device for all healthcare facilities that provide X-ray imaging services. Ensuring the proper use of an automatic X-ray film developing machine is essential to achieve accurate and quality images for diagnosis. By following the steps outlined in this article, healthcare professionals can take the necessary steps to maximize the efficiency and quality of their X-ray imaging services.
Post time: Jun-14-2023


